Up next in 10


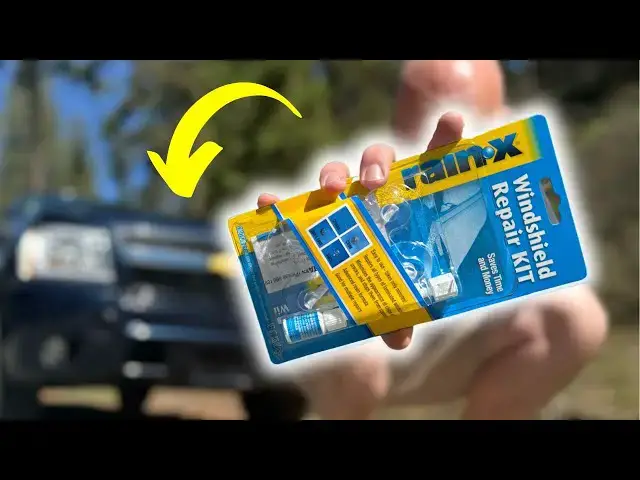
The sun is out, and it's finally time to fix the crack in my Tahoe's windshield! I'm using the Rain-X Windshield Repair Kit to try and minimize the crack, both for visibility, but also so that the crack doesn't get worse. I'll be installing the kit and reviewing it, so stay tuned!
- Get your Rain-X Windshield Repair Kit here (Paid Link): https://amzn.to/3JgTKjt
Show More Show Less View Video Transcript
0:00
Oh man, it is finally a nice day up here and I'm really excited because that means I have
0:05
enough sun to fix one of the biggest annoyances on my Tahoe and that would be my cracked windshield
0:12
So let me show you what I bought to get that fixed. And what we have is right here
0:17
So this is a windshield repair kit from RainX. I think it was about $12 at Walmart and it is to repair my windshield because as you can see
0:25
up here, I have a decent sized crack. Now, it quite literally is right in my eyesight and it is really, really annoying
0:33
So these little repair kits do a fantastic job from what I have had in the past
0:38
And the goal of it is not necessarily to completely get rid of the crack. It's to kind of minimize it as well as to make sure that the crack does not get any bigger
0:46
So we're going to go ahead and get right into it. So let's open up the packaging and go from there
0:50
Now before we get too far into the video, I do want to clean off the glass before I open the packaging or anything like that
0:56
because I do have dust and all that kind of stuff on this crack because this Tahoe is incredibly dirty
1:01
So let's go ahead and give a couple good cleans and wipes
1:05
And we're going to go from there. So let's now open the packaging
1:10
Okay, so the idea behind it is basically you can take a crack like that and make it look like that
1:15
Now you can't really tell probably from the video, but you can see ever so slightly that crack still exists
1:22
And so that's the idea anyways is to make it look pretty nice. It is an easy kit to do and it shouldn't take too long
1:29
So let's go ahead and open it up. All right. So we have a couple different components here
1:34
We have this. This is kind of that repair resin. So this is what actually goes into the crack itself
1:40
So we'll put that there. And then right here is a little kind of clamp that clamps onto the windshield
1:45
We're actually going to turn that up like that so it doesn't get dirty. And then right here is a little kind of screw
1:49
And that goes inside of this to be able to kind of clamp it down and really press the resin
1:55
into the crack. So we're going to want to jump in and open the directions and follow it step by step
2:02
So let's go ahead and do that. And I'm going to jump in and just kind of show you a step by step
2:06
as I read the directions and go through it. But we're going to go from there. Okay. So it says the first
2:11
step is to make sure that there is no more kind of, you know, glass coming off the top. You want it to be
2:16
completely flat. So you want to make sure that you have a razor like this one right here. So we're
2:20
going to go like this just to kind of flatten things out. And you want to make sure that there's just
2:25
It's really clean and there aren't anything's kind of sticking up. So that's done on that step
2:30
And then the next step is to go ahead and take this suction cup thing and you're going to place it directly over the crack
2:38
And you want to make sure that all of the cups are nicely suction down onto the windshield right here and you want to have it directly above the crack
2:48
By the way there are different directions based on if it kind of a long crack or not And in this case it is not it kind of one of those bull eye style cracks So I making sure it perfectly over top of it And make sure that those are pressed all the way down so that it not going to come off or anything like that
3:10
And that is that step right there. All right. So now I have you guys zoomed in a little bit. And what you're going to do is you're going to unscrew this little thing out of this chamber right here
3:19
And then we're going to take this chamber and we're going to screw it in
3:23
And actually let me take it off and show you guys. So this little tip right here is actually a little bit rubbery and it's going to have and it's going to suction cup essentially over the cracks
3:33
So what we're going to do now is basically screw this bottom chamber in and over top of the center of the crack
3:41
And what they say is you should get into the car and verify that it is over the crack
3:47
So I'm going to go ahead and do that. And it actually is not
3:52
So I need to move this over a little bit. So I'm going to go ahead and start over
3:56
And I'll do that really quick. All right. So now it is perfectly over the crack
4:03
And now we can go on to the next step. All right. And we are finally in the process now where we're going to be putting resin into the chamber
4:12
So we're going to go ahead and take this little. nub thing off, which I'm going to do with this razor here
4:23
There goes. There's a little piece there. All right. So we're going to do two to three
4:27
drops of this inside of the chamber. One, two, three. All right. So that is in there. I apologize. After reading it, it needs to be
4:39
three to six. So we're going to do six. Two, three. All right, that is six right. And we're
4:45
going to check to see if anything is leaking. out and it is not. So we're going to leave that there. And then we're going to take this little plunger here
4:54
And then what this does is it pressurizes the chamber to kind of push it down into the crack. So you got to screw it in almost all the way down
5:04
And that pressurizes the liquid to go into the crack. And so what we're going to do now is jump into the vehicle and make sure that the resin is going to
5:16
into it. It kind of doesn't look like it is. I mean, it might be. I might have to move the chamber
5:23
over a little bit. It kind of looks like. So it does say to give it four to six minutes to kind of
5:28
leak down into the crack. So we're going to go ahead. I'm going to tighten this a little bit more
5:33
I'm actually going to tighten everything a little bit more here. And we're going to give it a couple
5:38
minutes here to see if it goes in. All right. So the next step on this is actually to do that
5:43
last step again. What I'm actually going to do is I'm also going to go ahead and move this
5:47
over ever so slightly this way because I don think it quite perfectly over the crack So I going to go ahead and do that Right now I not seeing a ton of benefit quite yet but I think doing this again as the
5:58
directions say, we'll get that going. So I'm going to go ahead and remove the pressure port, and I'm going to remove this little
6:03
chamber and remove everything and move it over it, and then I'm going to do it all over again. Oh, and by the way, something I didn't realize is they actually do have a razor that comes
6:10
in the packaging, so you don't have to remember that for yourself. But anyways, let's keep this ball rolling
6:14
So I'm going to remove this right here. I'm going to remove this right here
6:20
I'm going to scoot it over. Push down, push down. And see where it is
6:27
That looks pretty good. So we're going to put some more resin down in it
6:33
So I'm going to do another three to six drops. And then we're going to put the little plunger back in there
6:38
Let it sit for four to six minutes again. Oh, and by the way, while we're waiting for that to happen, have you guys subscribed
6:46
If you haven't subscribed, I would encourage you to do that if you like videos like this of living with this Tahoe and other cars in my automotive life
6:54
And let's get right back to it. All right, so we do appear to be in a much better situation after I adjusted that
7:00
So let's go ahead and pull this off and see what it looks like and see if I need to do it again. So we're going to pull this
7:05
All right, there's the little pressure thing. Then we need to remove this
7:10
Let's go ahead and remove the whole thing. Oh, it is getting so much better. I don't know if you guys can see it on the camera
7:15
Let's see if I can... You can see the cracks are really starting to go away
7:21
I might go ahead and do it again, and I might move it up a little bit, and let's go from there
7:25
so I'll see you guys on the other side of doing that. Alright, so we are rounding third base now, so I'm going to go ahead and remove this apparatus now
7:33
and what we're going to be doing then is we're going to be putting plastic strips over top of it
7:37
so let's go ahead and do that. All right, so we're going to remove all of this
7:41
Now the cracks are still visible, but supposedly the next step of, which by the way
7:45
It's been years since I've done this. So this is still, this is honestly all pretty new to me
7:50
But we're going to remove that. We're going to remove this. We're remove the whole thing
7:57
As you can see, some stuff is kind of dripping out there, and that's fine. But what we're going to do is we're going to wipe this clean
8:04
And as you can, I don't know if you can see it on the video, but it is getting so much better
8:08
But what we're going to do now is we're going to take, they have little pieces of plastic that look like this
8:14
And then what we're going to do is we're going to do is we're going to do. We're going to take our little resin. We're going to put a little bit on top of it like that
8:22
And then you put the plastic over top. And what that's going to do is it's going to fill in all the little bitty, little cracks that are underneath of that
8:32
And then what we do now is, of course, wait for about five to ten minutes
8:39
And we'll come back to that. Right. And it has now been 10 minutes almost exactly So what I going to do now is I going to be peeling off this plastic right here And hopefully it is dry underneath and it does feel like it You can see right there
8:53
And as you can see, you can still, let's see. I guess it's a good sign that I can't get you to see it there
9:00
Okay, there it is. So you can see it still has a little bit of a spider crack to it
9:03
But what we're going to do now is at a 90 degree angle, we're going to start taking off the excess residue
9:10
And the idea is we remove enough of that you don't want any residue
9:17
left on the windshield itself and by the way as long as this is a 90 degree
9:21
angle you shouldn't be damaging your windshield whatsoever by this you'd be surprised at what your windshield can take
9:27
I'm going to try to get all of the residue off I also had some that kind of leaked down here
9:31
so we're going to remove all of that and let's go from there and before we have a final
9:37
look at the product I am going to go over here grab my glass cleaner
9:41
right here and we're going to clean off this glass to get a good look at everything
9:46
So let's take a look at what we have here. It's really, you know, it's really hard to film something on glass
9:59
But I'll see if I can get a picture and show it up on the screen here, but it looks much, much better
10:05
All right, and as you can see here, you can still see it. It's a little hard to get it to kind of show, but it is still definitely there
10:12
But again, the goal was not to get it to go completely away, and I knew that, but I'll be honest, I'm not quite as impressed as I would like
10:22
It's very possible I may do this another time. I actually don't have time for that today, but I might try to do it again at some point, which leads me to, I guess, kind of the review portion of this
10:31
Would I do this again? And yeah, I mean, obviously I said I probably would. And I probably would recommend this for most people
10:37
It is a really easy process. It's a little bit more difficult when I'm, you know, filming. But it's an easy process that I think about anyone can do
10:45
And considering how cheap it is, it's at least worth the attempt before you have to pay things like a deductible
10:52
especially when you're talking about much more expensive windshields than a Tahoe like this and more modern vehicles
10:57
So I think it is worthwhile to give a try. I have done it before and I actually feel like I did a better job at that point
11:04
But it may just be because I'm filming it this time that I didn't do quite as good of a job
11:08
So I may do this a second time at some point at home. and I might update you guys in a later video
11:13
So let me know your guys' thought. Was it worth doing that to my Tahoe
11:17
This took me about an hour to do. I think it was worth it
11:20
and I think it's worth the price to at least try it on your car if you guys have the exact same issue
11:25
This does also work on cracks, not just kind of that bullseye style of thing
11:30
and it's not that hard to do. So let me know in the comments, and if you guys want to purchase this for yourself
11:36
I do have a link down in the description and the top comment as well. It's a paid link, and I get a commission
11:40
decide to purchase it and I'll see you guys next time
#Autos & Vehicles
#Vehicle Repair & Maintenance
#Home Improvement